ESP-360-REMOTE
Quick-start guide
Install
Step 1
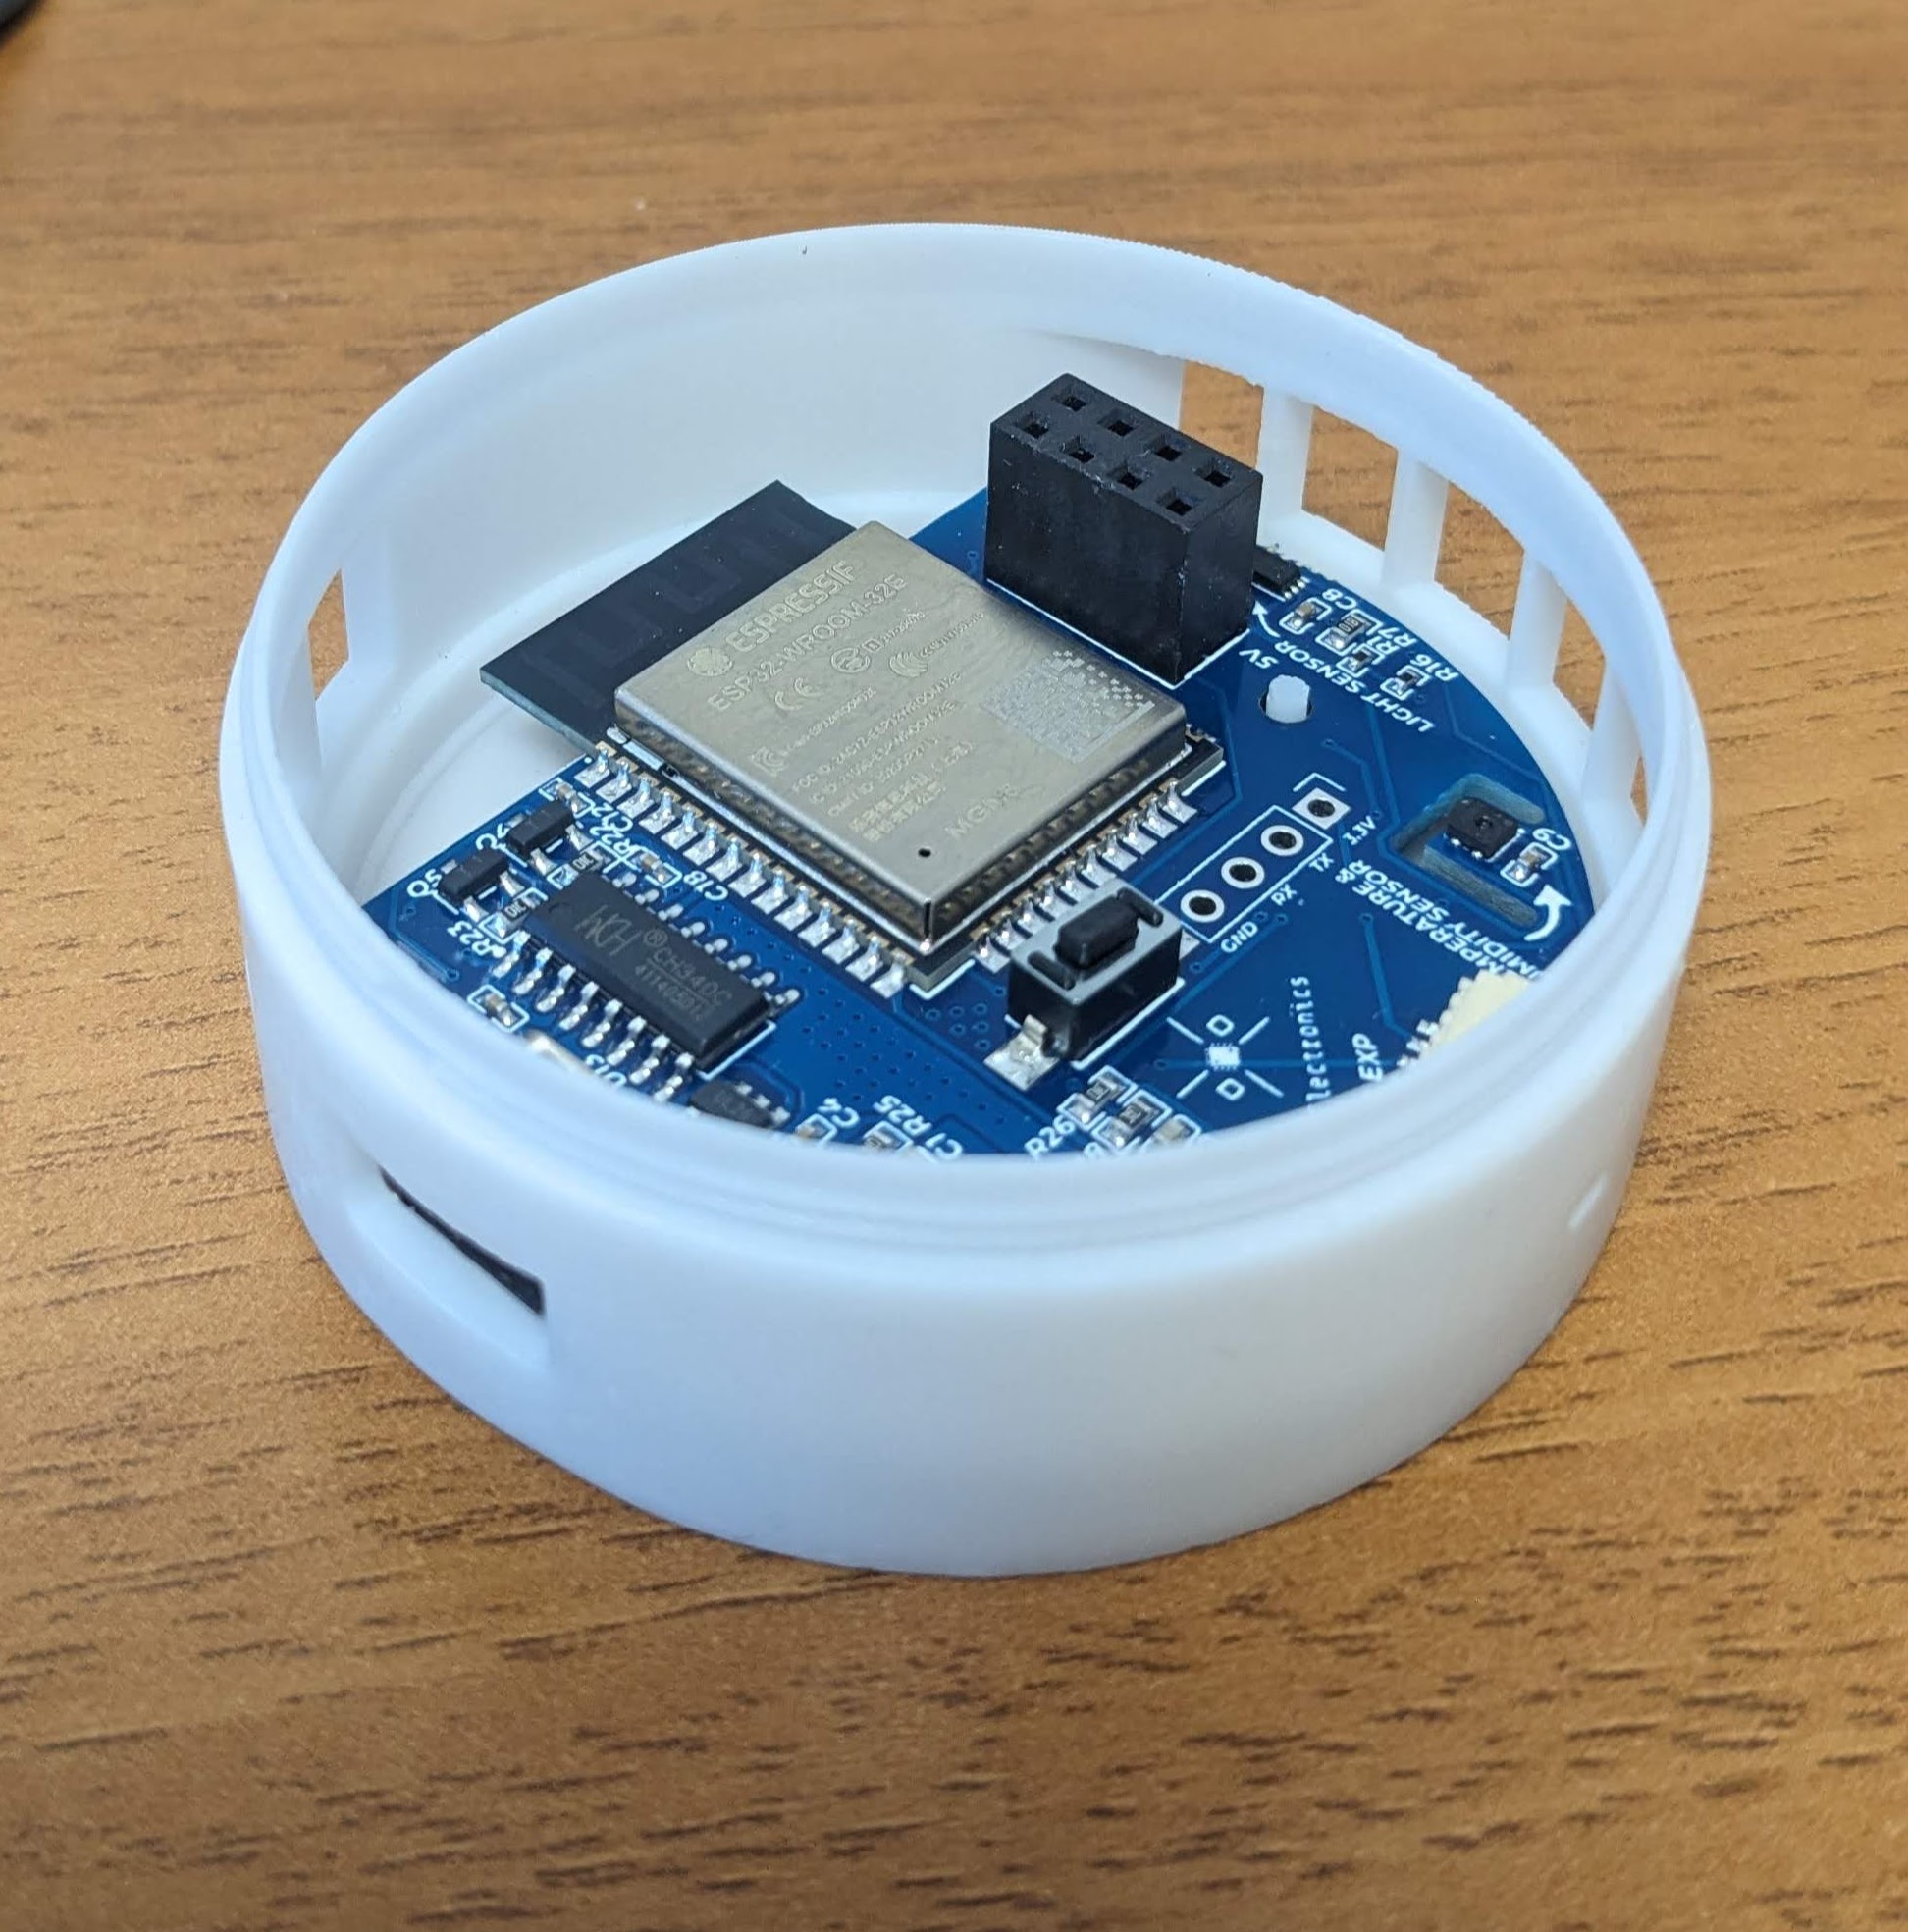
Insert the base of the ESP 360 Remote into the case and make sure that all the openings align, as well as the 3 holes in the PCB with the 3 plastic pins.
Step 2
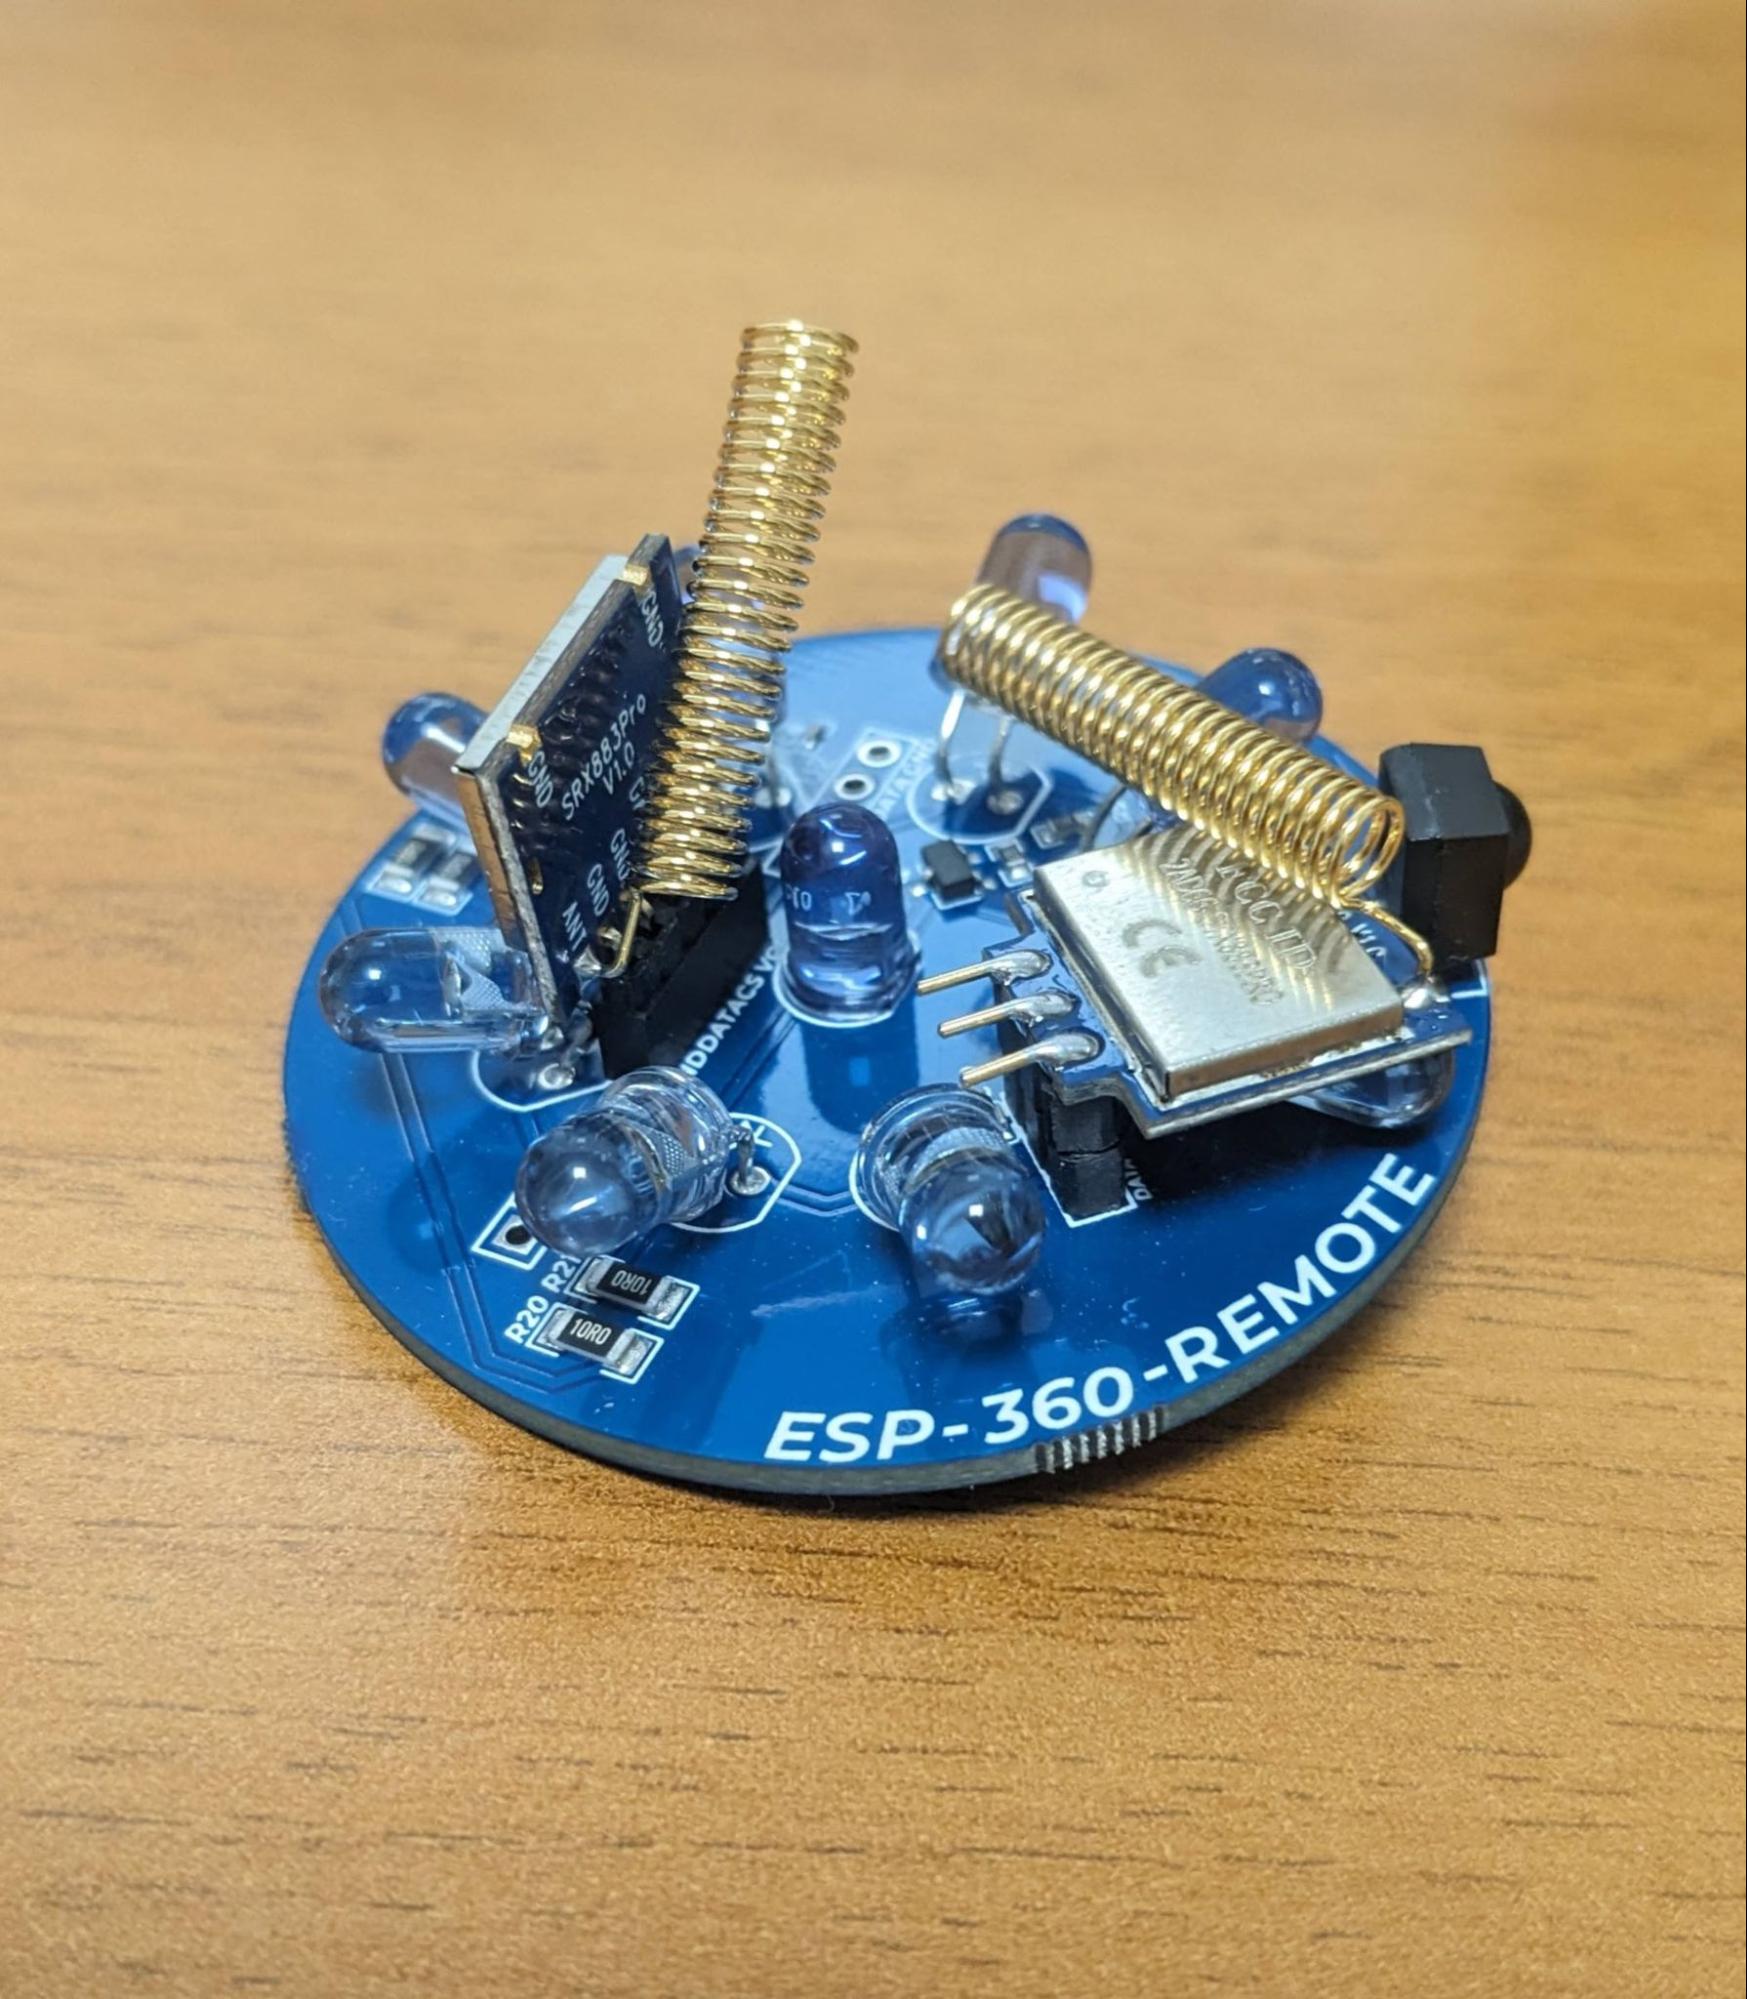
Insert the RF modules into the upper part of the PCB as shown in the picture and manually raise the infrared LEDs to a 45° angle. They are currently bent horizontally for transportation safety reasons.
Step 3
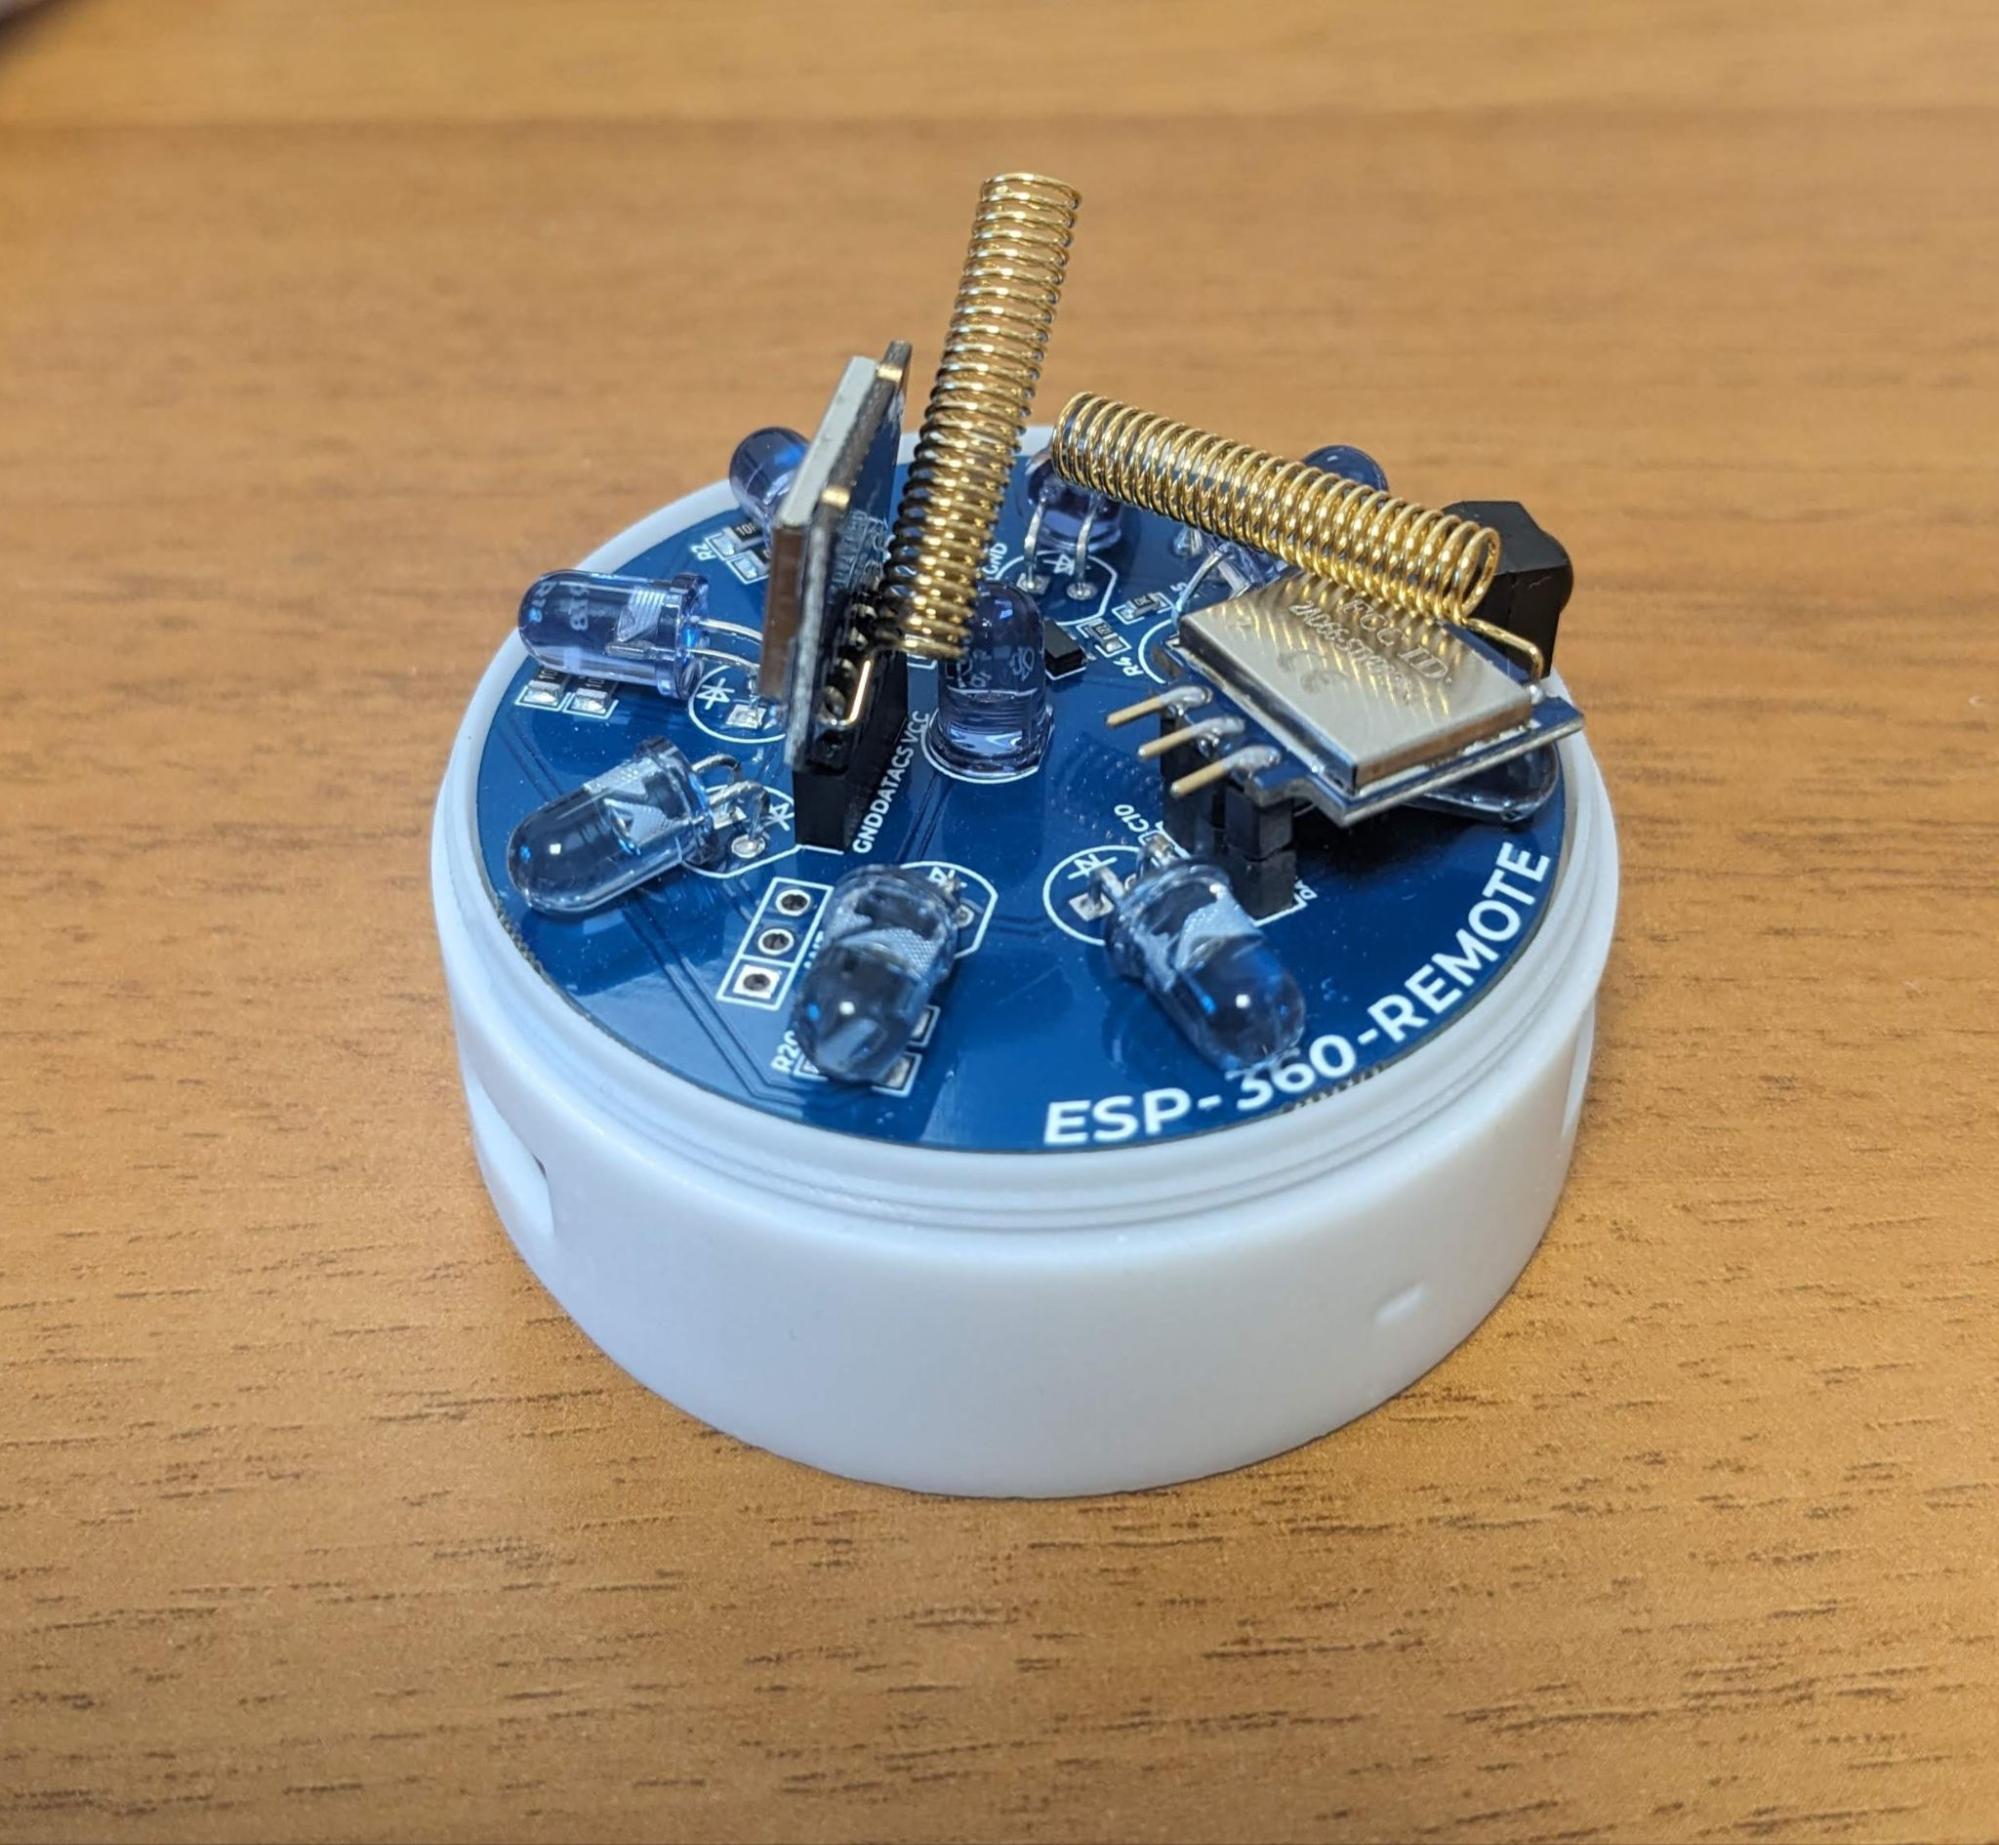
Insert the top PCB all the way into the base through the 8-pin connector.
Step 4
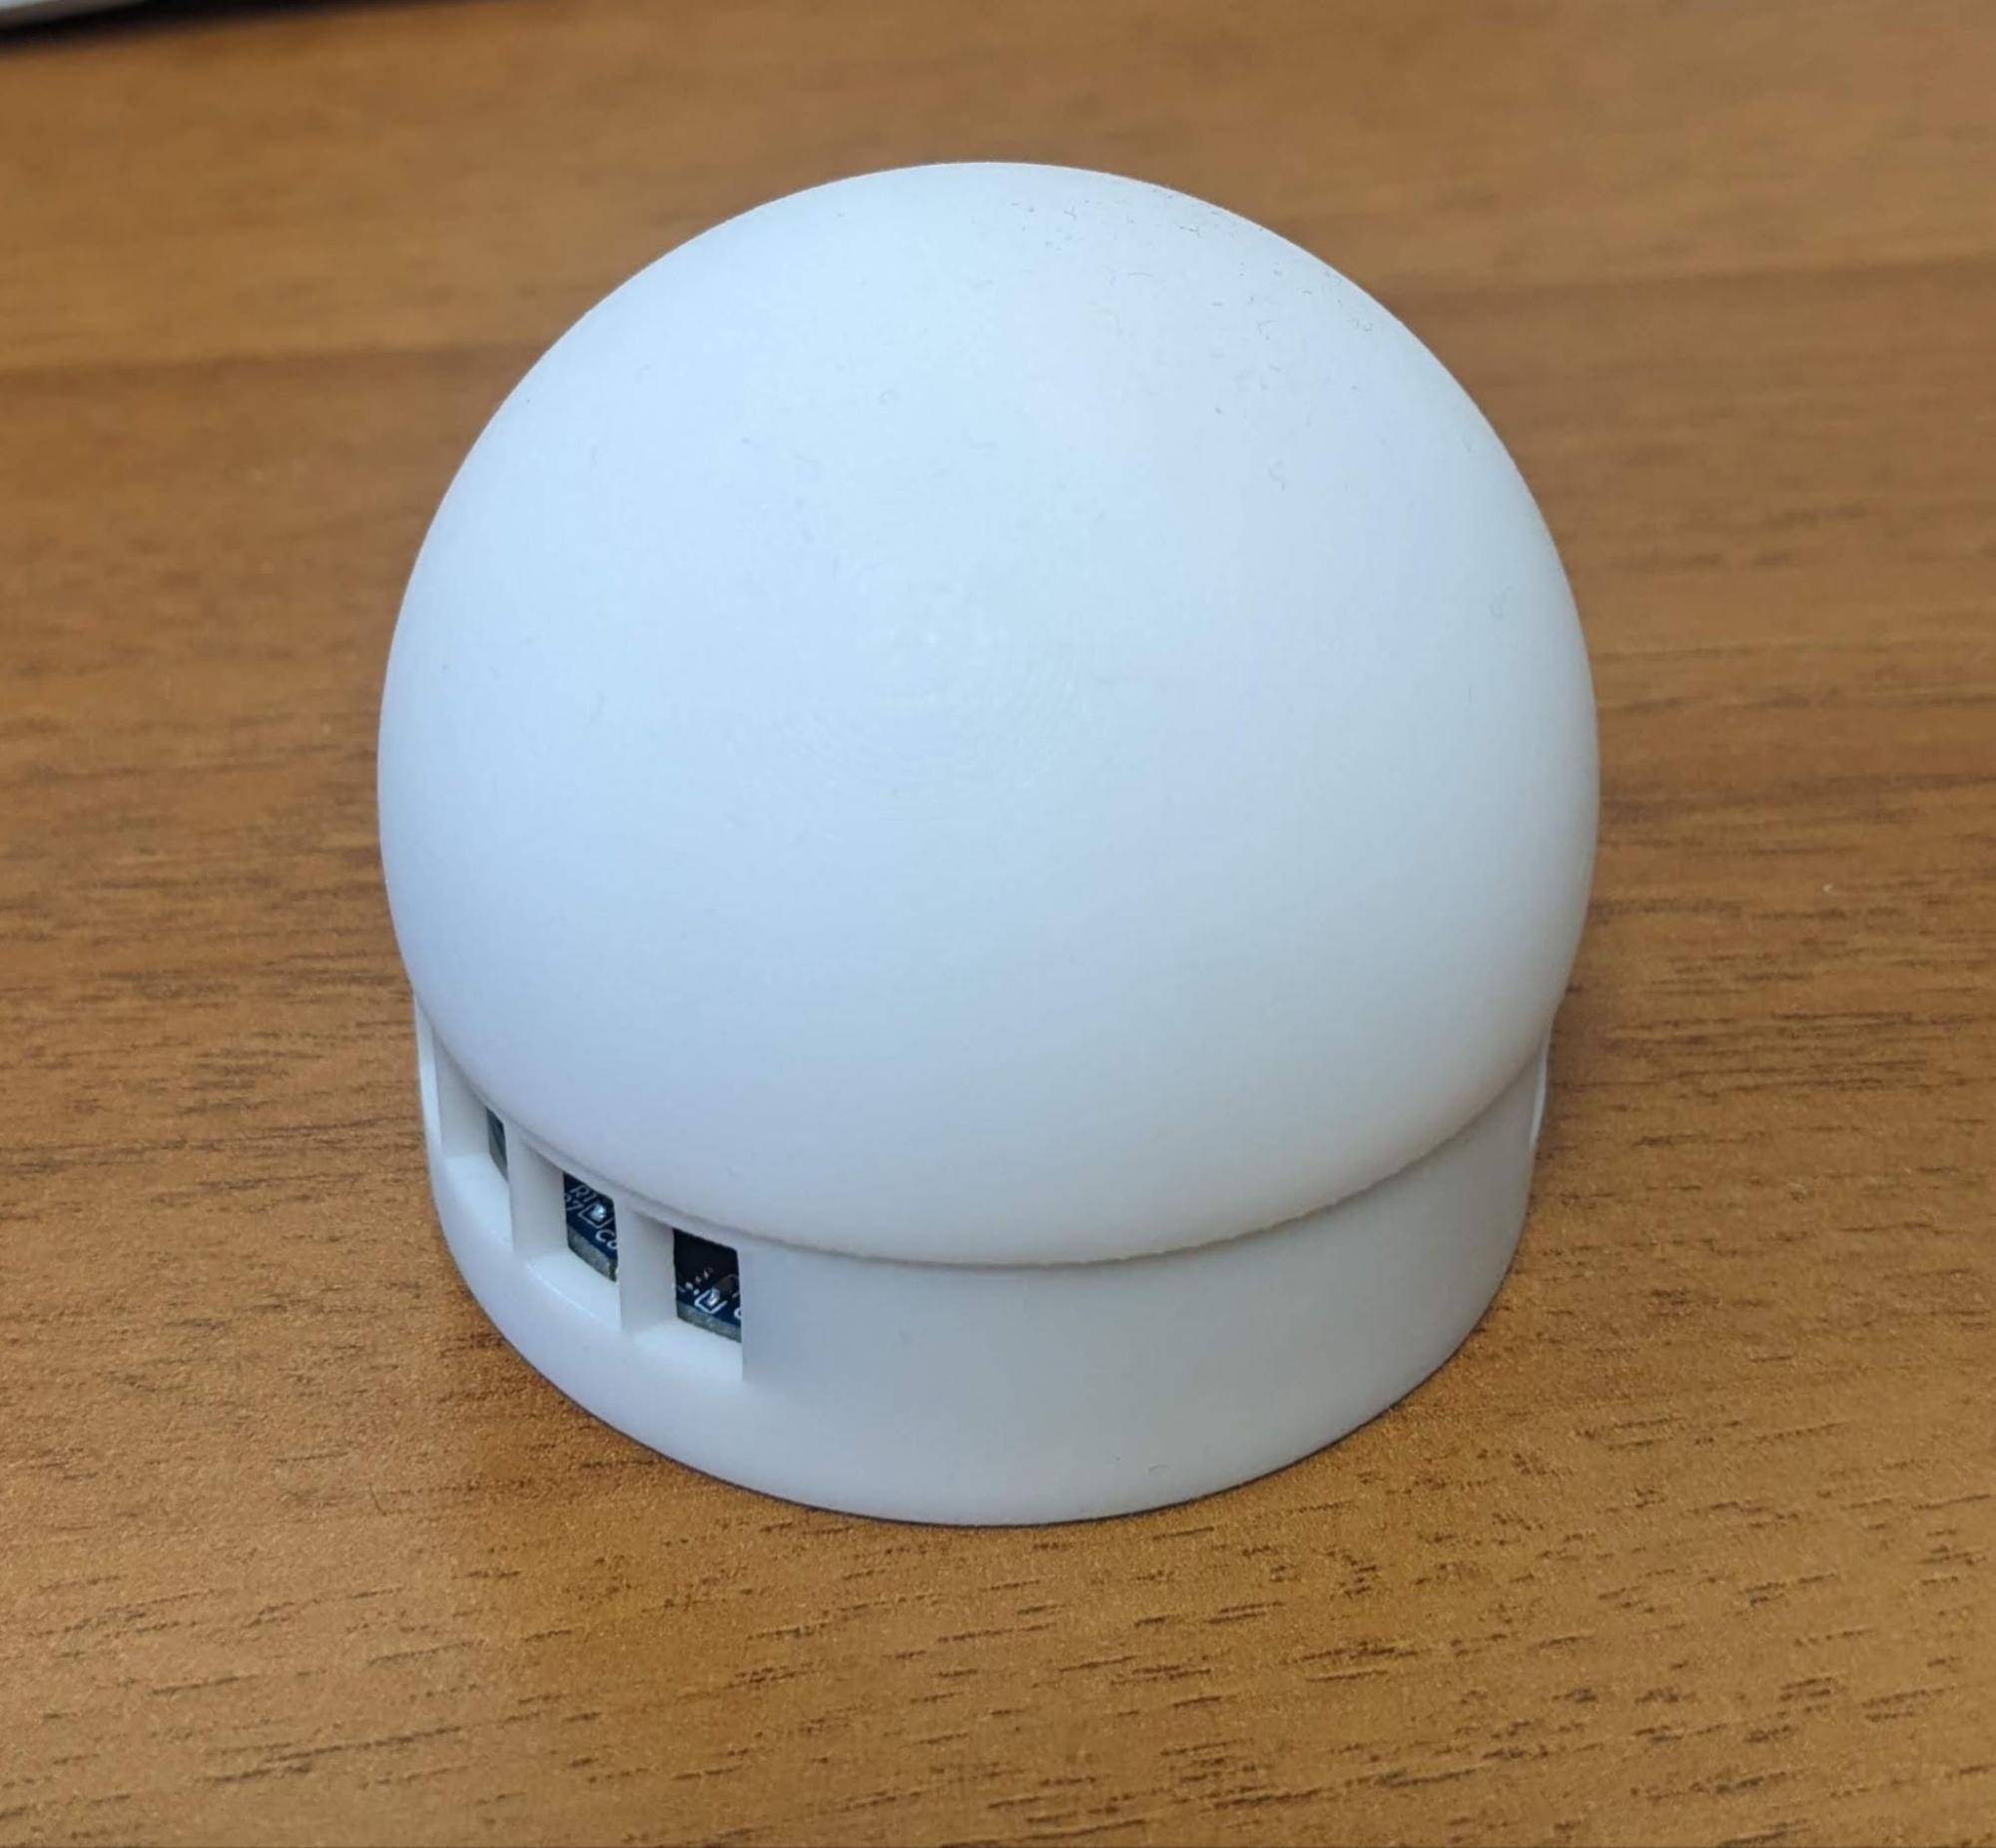
Close the case by screwing the top part, plug in the power cable, and wait for the board’s hotspot called Esp360Remote or Esp360Remote2 (if you ordered the teo pack) to appear!
Connect to Home Assistant
Step 1
When the fallback hotspot is available, connect to it with Esp360Remote as password (for both of the AP’s name)
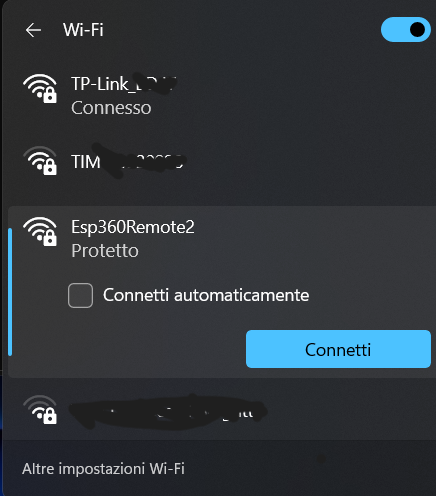
Step 2
After connecting to its hotspot, go to ip: 192.168.4.1 on your web browser, connect to your WiFi and you are done! Home Assistant should have now discovered your Esp 360 Remote!
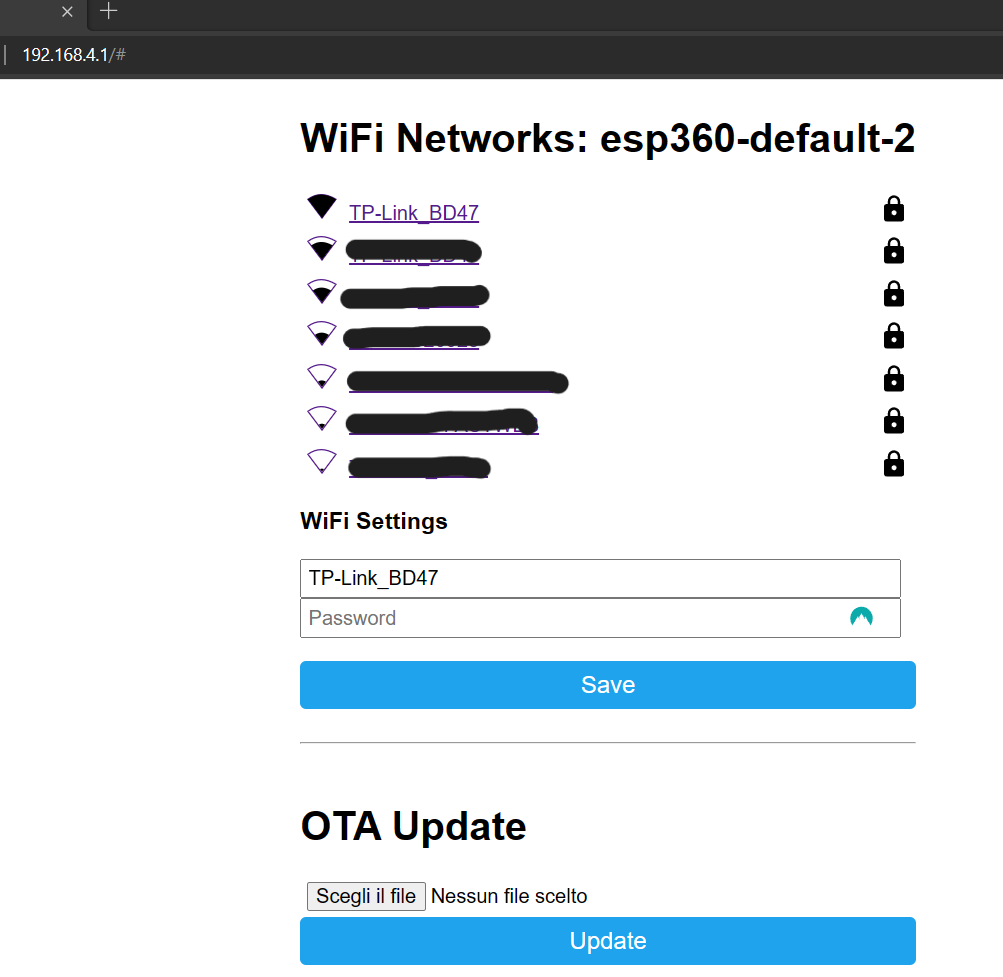
Step 3
Now you can go to the ESPHome dahsboard on your Home Assistant instance and create a new project clicking on the bottom-right “+” icon. Choose the name you want.
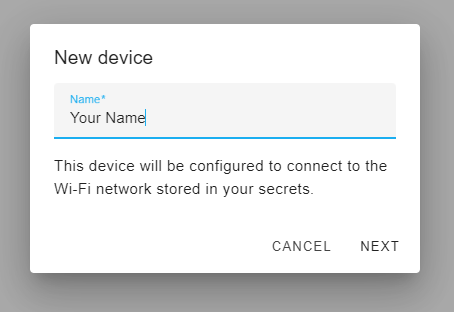
Step 4
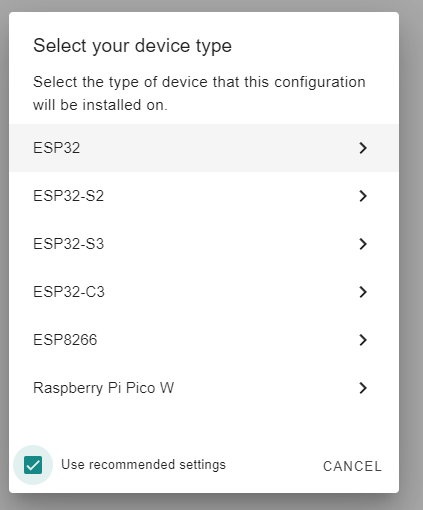
Now click on “skip this step” and then select the ESP32 in the next window.
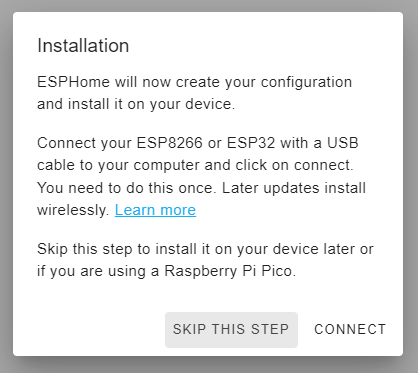
Step 5
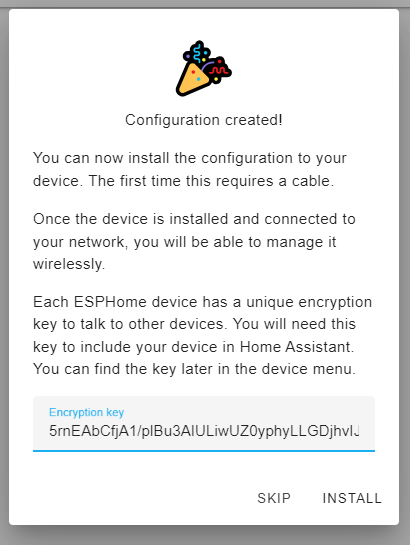
Now it will appear your new encryption key. You can save it somewhere and use it to modify the one in the default template, then click “SKIP”.
Step 6
At this point, you should have your new project in the dashboard. Then click “EDIT”, remove everything inside and copy and paste the default configuration. Use both the yaml files if have two boards. Then you can change the encryption key if with the one you saved before and be sure to change the WiFi settings with your credentials, otherwise it will create again its own hotspot. After you’ve done that, you can click “SAVE”, then “INSTALL” and select “WIRELESSLY”. If you’ve done everything correctly, you should be see your device online in the dashboard and should be able to modify their configuration!

